
Repair Basement Floor Cracks Guide: Expert Tips for 2026
Basement floor cracks can be a homeowner’s worst nightmare, leading to unexpected water leaks, structural risks, and a drop in property value. These cracks often appear suddenly, causing stress and uncertainty about what steps to take next.
If you want to protect your investment and avoid costly damage, you need reliable, up-to-date guidance. This 2026 guide was created to help you confidently repair basement floor cracks and prevent future issues.
Inside, you will find expert-backed advice covering the causes of cracks, how to assess them, repair methods, prevention strategies, and when to call in professional help. Follow along for step-by-step solutions.
Understanding Basement Floor Cracks: Causes and Risks
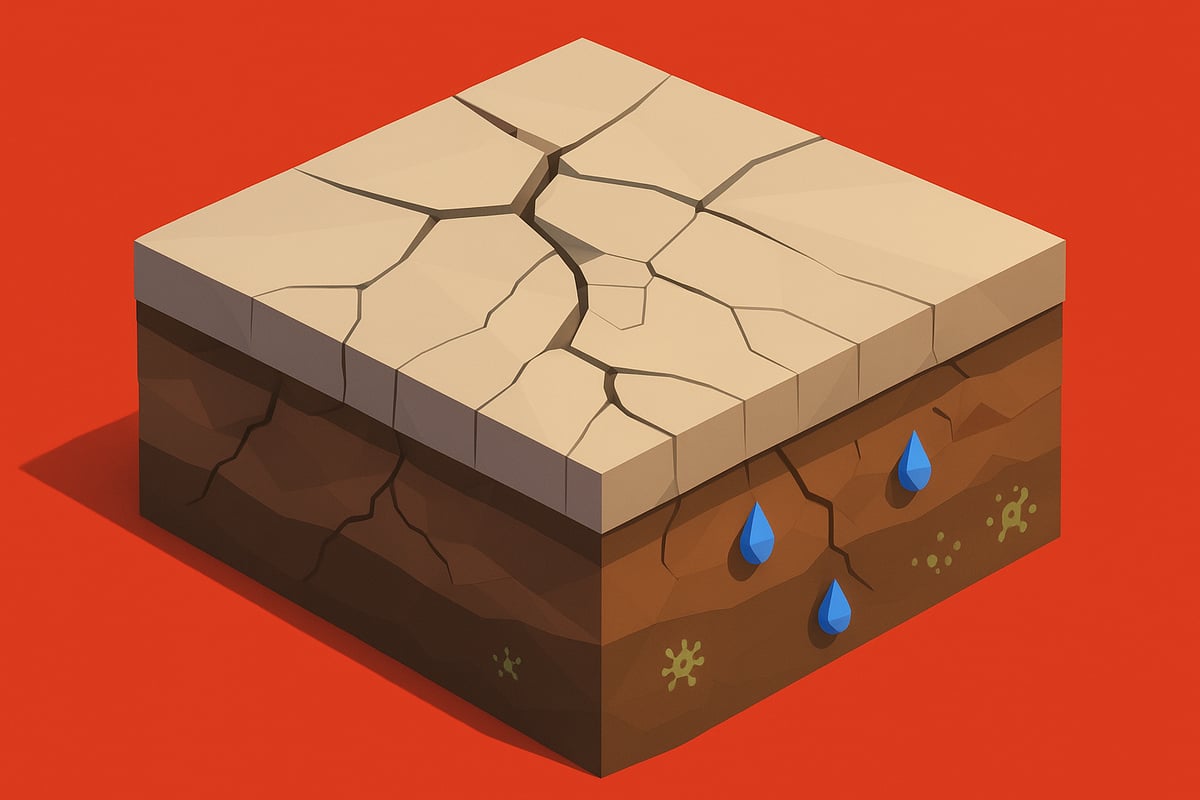
Basement floor cracks are a common concern for homeowners in Colorado and beyond. In fact, studies reveal that up to 60% of homes in Western Colorado experience some form of foundation cracking. When you repair basement floor cracks early, you help protect your home from significant water damage, structural complications, and costly repairs down the line. Understanding the causes and risks is the first step in safeguarding your property and maintaining its value.
Common Causes of Basement Floor Cracks
Several factors can contribute to the formation of cracks in your basement floor. The most frequent causes include:
-
Soil movement: Expansive clay soils, prevalent in Colorado, swell when wet and shrink during dry spells, causing the concrete to shift and crack.
-
Hydrostatic pressure: Water accumulation around the foundation builds pressure, forcing moisture through concrete and creating cracks over time.
-
Poor construction practices: Inadequate reinforcement, improper curing, or subpar materials can lead to premature cracking.
-
Climate factors: Freeze-thaw cycles, common in Colorado, cause concrete to expand and contract, increasing the likelihood of cracks.
If you want to repair basement floor cracks effectively, it is essential to identify the root cause. Addressing only the surface symptoms often leads to recurring issues.
Types of Cracks and How to Identify Them
Not all cracks are created equal. Recognizing the type of crack is vital for choosing the right repair approach. The main types include:
-
Hairline cracks: Thin and often superficial, these typically result from shrinkage during concrete curing.
-
Shrinkage cracks: Similar to hairline, but may extend deeper, forming as concrete loses moisture.
-
Settlement cracks: Occur when the soil beneath the slab shifts or settles unevenly, leading to wider gaps.
-
Structural cracks: Usually wider, longer, and may show vertical displacement, indicating possible foundation movement.
For a detailed breakdown of crack types and what they mean for your home, consult trusted resources such as Understanding Basement Floor Cracks. When you set out to repair basement floor cracks, start by identifying which category your crack falls under.
Risks Associated with Basement Floor Cracks
Unaddressed cracks can introduce a range of risks to your home. The most significant dangers include:
|
Risk |
Consequence |
|---|---|
|
Water leakage |
Promotes mold and mildew growth |
|
Mold growth |
Triggers allergies, damages materials |
|
Pest entry |
Rodents and insects access your home |
|
Structural compromise |
Weakens foundation, causes settlement |
Consider a Grand Junction homeowner who faced repeated water seepage every spring. The initial issue was a few hairline cracks, overlooked as harmless. Without prompt action to repair basement floor cracks, water intrusion led to persistent dampness and mold, making the space unusable until professional repairs were completed.
Long-Term Consequences and Importance of Early Action
Ignoring cracks in your basement floor can have serious financial and safety repercussions. Over time, small gaps can widen, allowing more water and pests to enter, ultimately threatening your home's structural integrity. In severe cases, neglecting to repair basement floor cracks may result in the need for major foundation repairs or even a full replacement, which can cost tens of thousands of dollars.
The key argument for homeowners is clear: early identification and action can save significant money and stress. Even if not all cracks are structural, each one warrants assessment to ensure your home remains safe and sound. When you repair basement floor cracks promptly, you minimize risks and protect your investment for years to come.
Assessing Basement Floor Cracks: Inspection and Diagnosis
Identifying the true nature of basement floor cracks is the cornerstone of effective repairs. A careful, methodical assessment helps homeowners avoid costly mistakes and ensures the right solution is chosen. To repair basement floor cracks successfully, you must start with a thorough inspection that considers every detail.
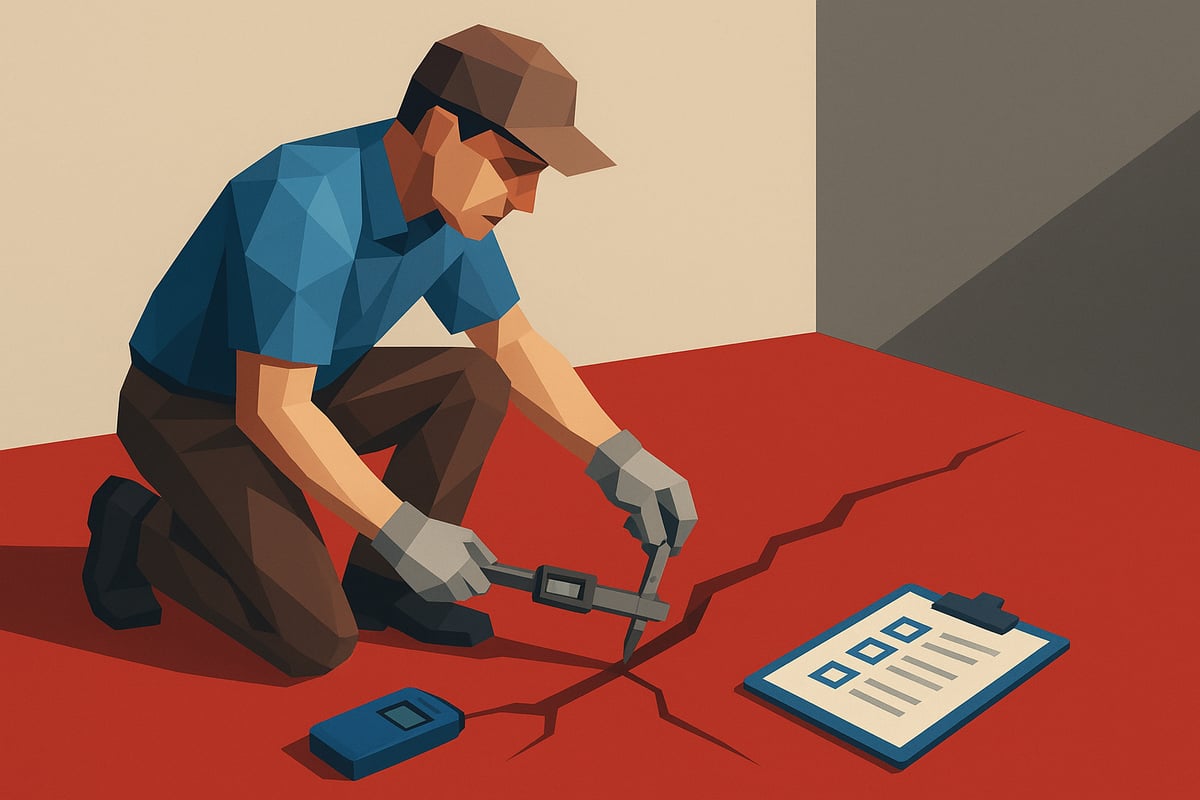
Visual Inspection Checklist
Begin by visually inspecting your basement floor. Look for cracks of any size, paying close attention to their width, length, direction, and location. To repair basement floor cracks effectively, document each crack’s characteristics.
-
Measure the width: Use a ruler or caliper to note if it exceeds 1/8 inch.
-
Check the length and pattern: Straight, jagged, or branching cracks may indicate different concerns.
-
Observe the direction: Diagonal cracks can point to settlement, while random patterns often signal shrinkage.
-
Note the location: Cracks near walls or columns may suggest foundation movement.
Regularly monitoring these features will help track changes over time and inform the best approach to repair basement floor cracks.
Essential Tools for Accurate Assessment
The right tools make all the difference during assessment. Basic items like rulers and flashlights are helpful, but advanced tools provide greater accuracy.
-
Crack gauges: Measure subtle widening or movement.
-
Digital calipers: Offer precise width measurements.
-
Moisture meters: Detect hidden water that can worsen cracks.
-
Camera or smartphone: Document the crack’s progression.
For example, a homeowner can use a ruler to mark the edges of a crack and photograph it monthly to detect changes. If you plan to repair basement floor cracks yourself, these tools will give you confidence in your diagnosis.
Cosmetic vs. Structural: Red Flags
Not all cracks are created equal. Some are merely cosmetic, while others may signal serious structural issues. Understanding which cracks require urgent professional attention is crucial before you repair basement floor cracks.
-
Cosmetic cracks: Hairline or surface-level, usually less than 1/16 inch wide, and not growing.
-
Structural cracks: Wider than 1/8 inch, growing over time, or accompanied by uneven floors or water seepage.
-
Red flags: Multiple cracks appearing at once, cracks near load-bearing walls, or significant moisture infiltration.
Industry data shows that structural cracks wider than 1/8 inch often indicate foundation movement. Accurate identification of these signs is vital when deciding how to repair basement floor cracks.
DIY or Professional Inspection?
Should you inspect and repair basement floor cracks yourself or call a professional? DIY inspections are cost-effective for minor cracks, allowing you to track changes and address simple repairs. However, professionals bring experience, advanced diagnostic tools, and knowledge of local soil conditions.
-
DIY pros: Immediate action, minimal cost, hands-on understanding.
-
DIY cons: Risk of misdiagnosis, missing hidden issues.
-
Professional pros: Thorough assessment, lasting solutions, warranty options.
-
Professional cons: Higher upfront cost.
If you notice widening cracks, recurring leaks, or structural shifts, professional evaluation is essential. Learn more about professional assessment and repair methods in this Basement Crack Repair Solutions resource, which details expert techniques and when to seek help.
A precise diagnosis is the foundation of any plan to repair basement floor cracks. By combining careful inspection, the right tools, and expert advice when needed, you can protect your home’s value and safety.
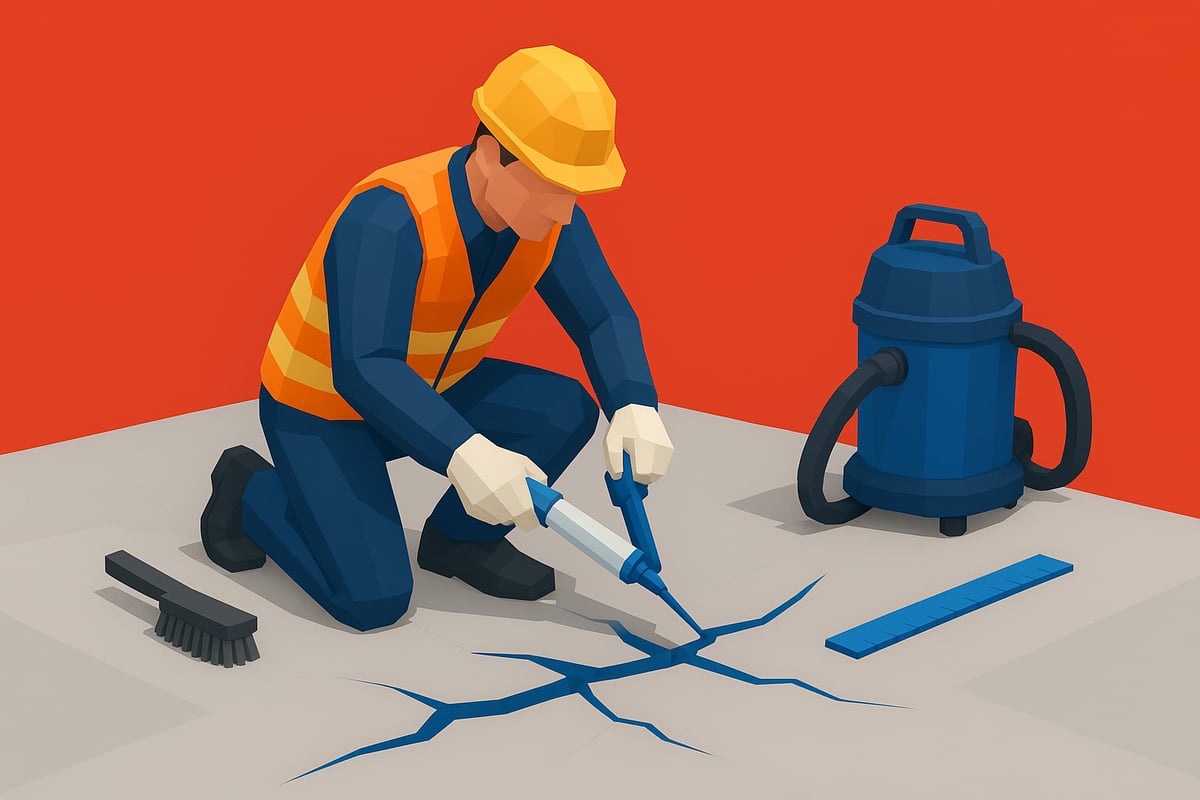
Step-by-Step Guide: How to Repair Basement Floor Cracks
Repairing basement floor cracks the right way protects your home from water, structural damage, and costly repairs. This guide walks you through every stage, from preparation to post-repair checks. By following these steps, you will address both the visible crack and any underlying issues, ensuring a long-lasting result.
Preparing for Repair
Before you begin to repair basement floor cracks, take time to gather the right materials and set up a safe workspace. Preparation is just as important as the repair itself. Start by collecting all necessary supplies:
-
Epoxy or urethane injection kits
-
Concrete patch or self-leveling sealant
-
Hydraulic cement (for active leaks)
-
Wire brush, vacuum, and mixing tools
-
Gloves, safety goggles, and a respirator mask
Clear the area around the crack. Move furniture, rugs, and personal belongings. Sweep away debris, then use a vacuum to remove dust and loose particles from the floor and inside the crack. Proper cleaning improves adhesion and ensures the repair material bonds well.
Ventilation is crucial. Open windows or use a fan to keep fresh air circulating, especially if you are working with chemicals. Always wear gloves, goggles, and a mask to protect yourself from dust and fumes.
A homeowner in Rifle, Colorado, faced a 10-foot basement crack after a wet spring. By spending extra time cleaning and drying the area, they ensured their repair basement floor cracks project would be successful. Remember, skipping preparation steps may cause the repair to fail prematurely.
If moisture is present in the crack, use a dehumidifier or fan to dry the area thoroughly. Water can weaken repair materials and lead to future issues. Once everything is clean and dry, you are ready to assess the best repair approach for your specific situation.
Choosing the Right Repair Method
Selecting the best method to repair basement floor cracks depends on the crack's width, depth, and whether it is structural or cosmetic. There are several proven options, each suited for different scenarios:
|
Repair Method |
Best For |
Pros |
Cons |
|---|---|---|---|
|
Epoxy Injection |
Structural cracks, load-bearing areas |
High strength, permanent bond |
More prep, costlier |
|
Polyurethane Injection |
Active leaks, hairline cracks |
Flexible, waterproof |
Not as strong as epoxy |
|
Concrete Patching |
Surface-level, non-structural cracks |
Easy, quick fix |
May not stop water intrusion |
|
Self-Leveling Sealants |
Small, non-structural cracks |
Simple application, flexible |
Limited to minor cracks |
|
Hydraulic Cement |
Active water leaks, wider cracks |
Fast setting, stops leaks |
Brittle, not flexible |
Epoxy injection is the gold standard for structural cracks. It restores up to 90% of the original concrete strength, according to recent industry data. Polyurethane is ideal for cracks that may expand or contract with temperature changes, as it remains flexible and waterproof.
For minor, non-structural cracks, concrete patching or self-leveling sealants are cost-effective and easy to apply. Hydraulic cement is best if you notice active water seeping through a crack.
Matching the repair method to the crack type is essential for long-lasting results. If you are unsure which approach fits your situation, review detailed Floor Crack Repair Techniques for additional guidance on materials and application steps.
Always read the manufacturer’s instructions for each product and check that it is suitable for your specific basement floor crack. Using the wrong material can lead to recurring problems or even worsen the damage.
Executing the Repair: Step-by-Step Process
Once you have chosen the right method, it is time to repair basement floor cracks with precision. Follow these step-by-step instructions for a professional result:
-
Widen the crack (if needed): Use a chisel or angle grinder to slightly widen the crack. This creates a better surface for the repair material to bond.
-
Install injection ports (for deep cracks): If using epoxy or polyurethane injection, insert ports every 8 to 12 inches along the crack. Seal between ports with epoxy paste.
-
Mix and apply repair material: Prepare your chosen repair compound according to the manufacturer’s instructions. Use a caulking gun for injection materials or a trowel for patches.
-
Fill the crack: Inject or spread the material from the bottom up. For injections, start at the lowest port and work upward. For patches, press the compound deeply into the crack.
-
Smooth and level the surface: Use a putty knife or trowel to create a seamless finish. Remove excess material before it hardens.
-
Allow for curing: Let the repair cure for at least 24 to 48 hours, or as specified by the product instructions. Keep the area dry and undisturbed.
-
Remove injection ports and finish: After curing, remove the ports (if used), sand the surface if needed, and vacuum up any dust.
For example, a homeowner repairing a 1/4-inch settlement crack followed these steps. They widened the crack slightly, installed injection ports, injected epoxy, and let it cure for two days. The finished surface was smooth, and the repair basement floor cracks process prevented further water entry.
Always check for missed spots or air pockets before the material hardens. If you find any, fill them immediately to ensure a watertight seal. Follow all safety guidelines and dispose of unused materials according to local regulations.
Post-Repair Checks and Clean-Up
After you repair basement floor cracks, thorough post-repair inspection is critical to long-term success. Begin by visually checking the repaired area for missed spots, uneven surfaces, or new cracks that may have appeared during curing.
Conduct a water tightness test. Pour a small amount of water over the repaired section and observe if any moisture seeps through. If you notice leaks, reapply the repair material as needed.
Clean all tools promptly to prevent adhesive buildup. Dispose of any remaining chemicals or materials safely, following local disposal guidelines. Proper clean-up ensures you are ready for future maintenance or repairs.
Monitor the repaired area for several weeks. Use a ruler or crack gauge to track any changes in width or length. Early detection of movement or new cracks allows you to address issues before they escalate.
Regular post-repair checks help prevent recurrence and catch potential failures early. By documenting your repair basement floor cracks project, you build a valuable maintenance record for your home, supporting property value and peace of mind.
Preventing Future Basement Floor Cracks
Preventing the need to repair basement floor cracks is far more cost-effective than dealing with recurring damage. Proactive care not only protects your home's value but also guards against water intrusion and potential structural issues. By understanding the key factors that contribute to cracking, you can take targeted steps to reduce risk and ensure long-term peace of mind.
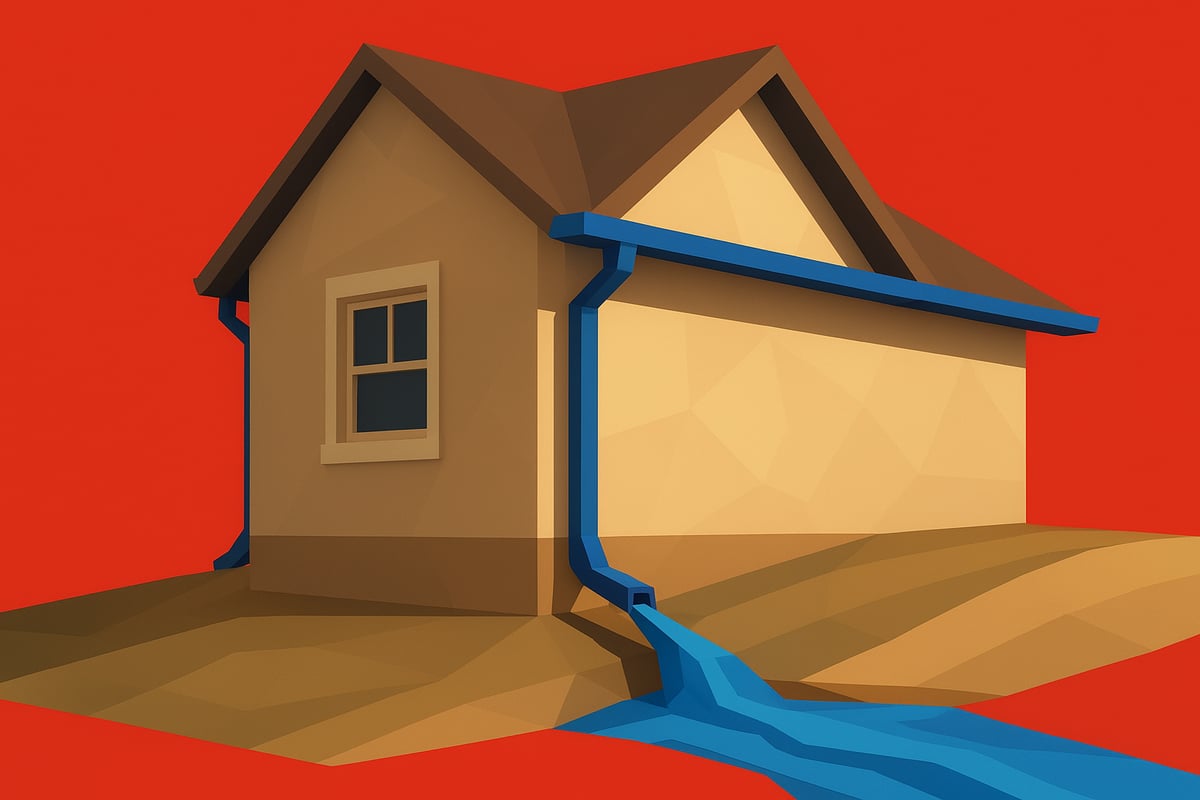
Addressing Drainage and Soil Management
Effective drainage is the first defense against the need to repair basement floor cracks. Start by ensuring gutters and downspouts are clean and extend at least six feet away from your foundation. Water pooling near the base of your home increases hydrostatic pressure, which can force moisture through even the smallest cracks.
Regularly inspect your yard's grading. The ground should slope away from your home to prevent water from collecting near the foundation. In Western Colorado, clay-heavy soils expand and contract with moisture changes, increasing the risk of movement under your slab. Adding landscaping features like gravel beds or French drains can further reduce this risk.
-
Extend downspouts to direct water away.
-
Maintain at least a 5 percent slope for the first 10 feet from the foundation.
-
Install splash blocks or drainage pipes where needed.
By managing water and soil movement, you lower the chance of developing new cracks and minimize the need to repair basement floor cracks in the future.
Basement Waterproofing
Waterproofing is a crucial layer of protection to prevent both minor and major cracks. Interior options like sealants, vapor barriers, or epoxy coatings can help stop moisture from seeping through the floor. Exterior waterproofing, such as applying membranes to foundation walls, is especially effective for homes in high-rainfall or flood-prone areas.
For a comprehensive overview of solutions, see these Basement Waterproofing Strategies. These methods not only reduce the risk of water-related damage but also help extend the life of previous repairs. Combining waterproofing with regular inspections ensures you rarely need to repair basement floor cracks caused by moisture.
Humidity Control and Seasonal Maintenance
Managing indoor humidity is essential for preventing cracks caused by concrete shrinkage and expansion. Use dehumidifiers in your basement to keep relative humidity below 60 percent. Install vapor barriers over exposed earth in crawlspaces to block moisture migration.
Seasonal maintenance is equally important. Inspect your basement floor and foundation each spring and fall for new or widening cracks, water stains, or mold growth. Early detection lets you repair basement floor cracks before they become significant problems.
-
Run a dehumidifier during wet months.
-
Check for condensation or musty odors regularly.
-
Schedule professional inspections annually if possible.
Example: Prevention in Action & Data-Driven Results
Consider a Grand Junction homeowner who faced repeated water seepage in the basement. By rerouting downspouts, sealing exterior walls, and regrading the yard, they eliminated moisture intrusion and stopped new cracks from forming. These simple steps prevented the need to frequently repair basement floor cracks and saved thousands in potential repairs.
Research supports these results. Homes with proper exterior drainage are 40 percent less likely to develop new foundation cracks. Investing in prevention not only protects your home's structure but also reduces ongoing maintenance costs. Remember, a proactive approach to repair basement floor cracks is your best defense against future headaches.
When to Call a Professional for Basement Floor Crack Repair
Knowing when to call a professional to repair basement floor cracks can mean the difference between a quick fix and a costly structural problem. Many homeowners are unsure whether a crack is a simple cosmetic issue or a sign of something more serious.
Warning Signs That Require Professional Attention
Certain symptoms should prompt immediate evaluation by a specialist. Ignoring these can lead to severe consequences that go beyond simple repairs.
Common warning signs include:
-
Cracks wider than 1/8 inch or cracks that are growing over time
-
Multiple cracks forming in different directions
-
Recurring water intrusion or persistent dampness
-
Uneven or sloping basement floors
-
Doors or windows sticking near the basement
If you notice any of these, it is time to seek expert help to repair basement floor cracks.
Risks of DIY Repairs for Structural or Complex Cracks
While some minor cracks can be addressed by homeowners, attempting to repair basement floor cracks that are structural or complex carries significant risks. DIY solutions may mask underlying issues, allowing problems to worsen undetected.
Incorrect products or poor application can result in water leaks, mold growth, and further damage. For structural cracks, only a professional can ensure the root cause is properly identified and remedied.
What to Expect from a Professional Assessment
When hiring a qualified contractor to repair basement floor cracks, you can expect a thorough inspection. Professionals use advanced tools such as digital calipers, moisture meters, and crack gauges to determine the severity and source of the problem.
A local Colorado specialist understands the unique challenges posed by shifting soils, freeze-thaw cycles, and regional construction practices. Their expertise ensures any repair is designed for long-term durability in your specific environment.
Cost Considerations and Long-Term Value
Investing in professional repairs may seem costly upfront, but it often prevents much larger expenses down the line. The table below summarizes typical cost ranges:
|
Repair Type |
Average Cost (2026) |
|---|---|
|
Minor cosmetic |
$250–$800 |
|
Structural repair |
$1,500–$5,000+ |
|
Full foundation |
$10,000+ |
For more details, see this Foundation Repair Cost Guide for a comprehensive breakdown by method and region.
Timely intervention can save thousands over the life of your home.
Real-World Example: The Value of Early Professional Help
A Montrose homeowner noticed widening cracks and called for an assessment. The expert identified early signs of foundation movement, enabling repairs before significant structural damage occurred. This proactive approach preserved property value and peace of mind.
Key Insight
Professional help is crucial when you repair basement floor cracks that show signs of structural movement or water intrusion. Early assessment can prevent severe damage and protect your investment for years to come.
Frequently Asked Questions About Basement Floor Crack Repair
If you are looking to repair basement floor cracks, you likely have questions about causes, proper repair methods, and when to seek professional help. Here, we answer the most common homeowner concerns to help you make confident decisions and protect your property.
What causes basement floor cracks?
Basement floor cracks often result from soil movement, hydrostatic pressure, concrete shrinkage, or poor construction practices. In Colorado, expansive clay soils and freeze-thaw cycles also play a major role. Recognizing these factors early can help you repair basement floor cracks before they worsen.
Are all cracks a sign of structural damage?
Not every crack means there is a structural problem. Hairline and shrinkage cracks are usually cosmetic, while wide, offset, or growing cracks could indicate foundation movement. To repair basement floor cracks effectively, always start with a thorough inspection to determine the severity.
How can I tell if a crack is serious?
Cracks wider than 1/8 inch, those that grow over time, or cracks accompanied by water seepage or uneven floors may signal serious issues. Monitoring changes with a ruler or crack gauge helps you decide if it is time to repair basement floor cracks or call a professional for assessment.
What is the best method to repair basement floor cracks?
The best repair method depends on the crack type and underlying cause. Epoxy and polyurethane injections are ideal for structural cracks, while surface patching or self-leveling sealants suit minor, non-structural cracks. For a detailed look at proven techniques, visit Basement Floor Crack Repair Methods.
Can I repair basement floor cracks myself?
Many homeowners can repair basement floor cracks themselves if the cracks are minor and not growing. DIY kits are suitable for hairline or shrinkage cracks, but structural or recurring cracks require professional evaluation. Incorrect repairs may hide deeper problems, leading to costlier fixes later.
How much does it cost to repair basement floor cracks?
Costs vary based on crack size, repair method, and local rates. Minor DIY repairs may cost as little as $250, while professional structural repairs can range from $1,500 to $5,000 or more. For a comprehensive breakdown, see the Foundation Crack Repair Cost Guide.
How can I prevent new cracks from forming?
Prevention is key. Ensure gutters and downspouts direct water away from your foundation, and maintain proper soil grading around your home. Basement waterproofing and humidity control also reduce risks. Regular inspections help you repair basement floor cracks before they become major issues.
When should I call a professional for help?
Call a professional if you notice wide, growing, or multiple cracks, recurring water intrusion, or uneven flooring. Early intervention by a local expert, like Aspen Foundation Repairs, can prevent costly structural repairs and protect your investment.
Who should I contact for expert basement floor and foundation repairs in Colorado?
For trusted, long-lasting solutions to repair basement floor cracks in Western Colorado, reach out to Aspen Foundation Repairs. Their team specializes in local soil and climate challenges and offers free inspections for Mesa County and nearby areas.
As you’ve learned, basement floor cracks can quickly lead to bigger headaches like water intrusion or structural concerns—especially here in Colorado, where local soil and weather play a big role. If you want peace of mind and expert guidance specific to your home, it’s wise to get ahead of the problem before it gets worse. You don’t have to guess about the best solution; Aspen Foundation Repairs offers decades of local expertise and a truly thorough inspection process. Take the first step to protect your foundation and Get Free Estimate from professionals who understand your needs.
